Showing posts with label butterflies. Show all posts

Friday, September 14, 2018

Hurricane Florence Versus the Butterflies

With Hurricane Florence smashing into the East Coast of the US this week, just as Monarch butterflies are starting to migrate, I wondered how the insects would be affected by such a huge storm.  Would they be able to survive, or would this be a major setback for the struggling species?

Male monarch nectaring on a New York Aster
It's a little hard to tell right now of course, the storm only just arrived in the Carolinas today. But I found some anecdotal stories about how Monarch butterflies survived previous hurricanes that made me feel a little less anxious.

According to this post from Journey North, butterflies and caterpillars are likely to take shelter before a bad storm hits. Perhaps they can sense the sudden drop in pressure or something else that precedes the storm, and know to get out of the way. Another post on Journey North quotes Florida monarch-watcher Harlen Aschen, who says he's seen butterflies withstand even 50 mph winds, clinging to plant stems.

In 2015, Hurricane Patricia also smacked into Arizona just as the western population of monarchs was due to migrate through there. According to this news article from azcentral.com,  in a fortunate turn of events, the monarchs actually moved their path eastward, out of the way of the hurricane! Wow. That's pretty significant. Did they know to do that? Or were they just luckily and coincidentally blown off track? We don't really know.

So the biggest risk to butterflies from a major storm isn't likely to be of hurting the butterflies themselves, but instead destroying the habitat they depend on. If a lot of areas get flooded, nectar sources the butterflies need to fuel their migration could be hard to find.

So what can we do to help butterflies make it through hurricanes?  I found a few suggestions. Birds and Blooms magazine recommends we gardeners add lots of places in our yards for butterflies to find shelter. Strong tall plants for them to cling to, lots of loose earth and rotting leaves for caterpillars to hide in, and loose stone walls or log piles with lots of crevices into which butterflies can crawl. After the storm passes, if there was a lot of flooding in your area, the remaining nectar sources will probably be minimal, but butterflies will still be as hungry as ever. Since fall is a great time to plant anyway, why not add some additional late-blooming nectar sources to your yard, like goldenrod and asters? The more blossoms you can add to your yard after the hurricane, the better for any passing butterflies.

So get through this storm. Then once it passes, you can look for ways to help your local butterflies recover or to help protect them from the next storm. 
Be safe out there!

Monday, May 7, 2018

Butterflies by Group—Recognizing in the Field


There are some tips and tricks to identifying butterflies in the field, as I mentioned in my last post, "Butterflies for Beginners." Another good way to improve your butterflying skills is to learn the general characteristics of different types of butterfly. Once you've narrowed a new butterfly's ID to a basic group, finding the right species account in your field guide will be much quicker and easier. 

Spicebush Swallowtail

  • Swallowtails
    • Large, strong fliers
    • Rounded “tails” off hindwings


Cabbage White
  • Whites & Sulphurs
    • Medium size
    • Often fly erratically
    • Usually perch with their wings closed, showing the pattern on their underwings
    • Species in our area [MidAtlantic] usually have a few darker markings on a whitish/yellowish/orange background.


Juniper Hairstreak


  • Hairstreaks
    • Small
    • Erratic flight
    • Most species have thin hairlike “tails” off their hindwings, thought to be false antenna to trick predators
    • Often rub their hindwings together while perched, making those tails wiggle like antenna
    • Elfins
      • Univoltine (single-brooded)
      • Only flight is in early spring, roughly April
      • Tailless
      • Patterned in all browns
      • Not quite as fast fliers as other hairstreaks

Eastern Tailed-Blue

  • Blues & Azures
    • Small
    • Whitish/gray underwings, blue/gray/white upperwings
    • Beware the Eastern Tailed-blue, which has tails like a hairstreak—even rubs its hindwings together just like hairstreaks do.

Great Spangled Fritillary

  • Fritillaries
    • Medium to large
    • Patterned in oranges & browns
    • Most of our fritillaries have obvious silver spots on their underwing, except for the Variegated Fritillary.


  • Crescents—only one species in our area, Pearl Crescent
    • Small
    • Orange & black

  • Checkerspots—only 2 species in our area, Silvery Checkerspot and Baltimore Checkerspot (rare)
    • Medium
    • Orange & black

  • Anglewings
    • I highlighted our two local species, Eastern Comma & Questionmark, in a “Tricky ID” blog post for my butterfly survey project.
    • Distinctive shape
    • Upperwing orange with black markings
    • Underwing dead leaf mimic
    • Silver mark on underside of hind wing- shape determines E. Comma or Q. Mark
    • Fond of non-nectar food sources, but may also be seen at flowers

American Lady
  • Distinctive Brushfoots
    • Brushfoot—front pair of legs reduced in size and covered with hairs, often doesn’t touch perch
    • Brushfooted butterflies also include Fritillaries, Crescents, Checkerspots, Anglewings. “Distinctive” don’t fit with the other categorizations though, so best to look at the silhouettes in your field guide and familiarize yourself with species photos.
      • Mourning Cloak
      • Red Admiral
      • Painted Lady
      • American Lady
      • Common Buckeye
      • Red-spotted Purple
      • Viceroy
      • Monarch

  • Satyrs
    • Medium size
    • Brown, with eyespots
    • Often have very bouncy flight
    • Typically found in woodland clearings or near forest edges
    • Likely eat from non-flower sources, some species will come to flowers though.

Silver-spotted Skipper
  • Spread-wing Skippers
    • Medium size
    • Includes Silver-spotted Skipper, Duskywings, Cloudywings
    • Don’t usually “jet plane” like smaller grass skippers, although they can

Sachem skipper in the "jet plane" posture

  • Grass Skippers & Skipperlings
    • Small
    • Oranges & browns
    • Note the “jet plane” posture they often assume: forewings held vertically, perpendicular to their horizontally spread hindwings
    • Often the pattern seen on upper hindwing is diagnostic, so try to get looks at both the jet plane and closed postures if you can
    • Several species are very similar! It’s a challenge to discern subtle differences.

Sunday, May 6, 2018

Butterflies for Beginners

Spicebush Swallowtail nectaring on milkweed at Huntley Meadows, in Alexandria, VA

Today's post was originally published for the butterfly survey project I run, over at Woodend Sanctuary in Chevy Chase, Maryland. Since the weather has been nice and warm for several days now, we're starting to see quite a bit of butterfly activity. There are hundreds of different kinds of butterflies, of many shapes and sizes. It can seem kind of bewildering at first when you're learning how to identify them. Over the years I've found several strategies can help you make sense of it all, though-- in particular learning what you need to look for. So to help you out, here is my general strategy on how to butterfly an unfamiliar butterfly in the field.

Size
The first observation to make when you see a new butterfly is its relative size. Our largest butterflies, swallowtails, tend to be about 3 or 4 inches across. Our smallest, blues and azures, are barely an inch across. The rest are somewhere in between. A birding trick that also works for butterflies is to use a familiar butterfly to help you remember an unfamiliar butterfly's size. Cabbage Whites are probably our most ubiquitous butterfly, and their medium size make them a great comparison.


Cabbage Whites are about 3 inches across when their wings are open, or 1.5 inches when their wings are closed like in this photo.  

Color(s)
Next you want to check out the main color of the butterfly. If it’s flying you may only get a general impression, e.g. darkish, or somewhere between white and yellow. Don't worry too much if you can't see details just yet.


A Peck's Skipper was posing nicely when I went to take the shot, but then of course took off as soon as I pressed the shutter release. But if this was what I actually saw in the field, I could guess it was a skipper because of the small size and the orange-and-black coloring.
  
Flight Style
While the butterfly is in flight (which it almost certainly is), take a look at *how* it flies. Some kinds of butterflies have easily recognizable flight patterns that can help you identify them, especially in combination with their general size.

  • Blues and Hairstreaks fly very erratically, switching directions every few seconds.
  • Swallowtails and Fritillaries fly more strongly and steadily than the smaller Blues & Hairstreaks.
  • Satyrs and Browns have a distinct “bouncy” style of flight—that is, veering up for a ways and then back down, then up again. 
 Once the butterfly finally comes to a rest, perhaps on a flower to nectar or on a sunny leaf to bask, you should look more closely at its colors and markings. The exact shape, size, and location of markings (stripes, spots, and /splotches/) varies from species to species. Some species that look relatively similar, like Spicebush and Pipevine Swallowtails, are easy to tell apart when you know which field marks are different. Pipevine Swallowtails have big round orange spots on the underside of their hindwings (the right-hand image below), while Spicebush Swallowtails’ spots are smaller and differently shaped.


You should remember that butterflies often have different markings on their upper (dorsal) side than on their under (ventral) side. Also take note of whether the markings are on the forewings (the pair of wings closest to the butterfly’s head) or the hindwings (closest to their abdomen). This will be important when you're reading descriptions of possible butterflies in your field guide, or looking at photos or drawings to compare them to your butterfly.

Finding butterflies in the field

But of course, all the skills in the world won't help you if the butterflies are nowhere to be found, right? Or, for that matter, if you can't get close enough to see them well. So here are a few tips to help you get better looks at butterflies than you might otherwise.

Sun-- Don't let your shadow pass over the butterfly you're watching. A sudden shadow tells the butterfly a predator may be looming above and about to strike. It's a great way to startle a previously resting butterfly into flight.

Speed-- Move slowly and steadily when approaching a butterfly for a photo. You can walk at any speed you like most of the time, but when you're trying to sneak closer to a resting butterfly, sudden movements might startle it into flight. (In fact, I often first spot a butterfly when it startles and takes into the air from wherever it was resting beside the path. Then I have to watch and/or chase it in hopes it will land again somewhere.)

Stillness (part 1)-- Butterflies are much easier to identify and photograph when they're not in flight. Although they do seem to spend most of the time in the air, you're not likely to get a sharp photo of a flying butterfly. Although (with practice)you can identify butterflies in flight as you pick out certain field marks that help you rule out possible IDS, your camera is unlikely to be able to capture those field marks in focus enough for an iNaturalist confirmation. So a better plan is to follow the butterfly, ready to look more closely and/or photograph it as soon as it sets down on a flower or leaf.

Stillness (part 2)-- If you get frustrated at chasing airborne butterflies, you could also try lying in wait for them. Select a flowering plant and wait discreetly nearby. Any butterflies that stop for a sweet meal will be easy to view and photograph. There's no guarantee that your specific plant will host butterflies while you watch, but it's still worth a try if chasing butterflies isn't working for you.

Happy butterflying! Let me know what you see, or if you have any questions about butterflies, in the comments.

I found this Monarch nectaring on some New England Asters at Brookside Gardens in Wheaton, MD.

Sunday, April 2, 2017

How to raise caterpillars from eggs to butterflies

So you want to raise caterpillars. Congratulations! Maybe you want to help support the Monarch butterfly migration, or you want to share a biological investigation with your children, or you think it looks like fun. Whatever your reasons, I'm happy to help.

For the purposes of this post, I'm not going to go into how to get butterflies into your yard, that's another post. I'll assume at this point that you have a caterpillar or eggs in hand.

Please don't buy caterpillars online-- they may be sickly and you are very likely to find caterpillars in your own yard or garden, or in that of someone you may know. Many gardeners, if you ask them, would be overjoyed for you to remove caterpillars from their plants!

A Black Swallowtail caterpillar about to devour carrot greens.

Finding and Feeding caterpillars
Different types of butterflies need different hostplants for their caterpillars to eat. In my area the most common kind of butterfly is the Cabbage White (Pieris rapae). They aren't native to the U.S., but I think they're fine for your first try. It's easy to find a plant they'll eat: anything in the cabbage family -- radishes are probably the easiest and quickest to grow, and they're happy in a flowerpot if you don't have an in-ground garden. If you spot a radish whose leaves look pretty chewed up, that's a good clue you might find Cabbage White caterpillars on it.

Other caterpillars that are popular to raise include Black Swallowtails, which eat anything in the carrot family; and Monarchs, which eat any species of milkweed. My posts about raising caterpillars are collected here. Always make sure to identify caterpillars you find so you can provide the right hostplant. When I was a little girl I tried to raise caterpillars every summer by feeding them grass, because I didn't know they wouldn't eat just any plant. Of course, they all died. But you can do better!

Releasing one of my successful Black Swallowtails a few years ago.

Caterpillar Cages 
You'll need a container of some sort to keep your caterpillars in, that's closed to keep them safe. A jar  is fine with a paper towel or pantyhose fastened over the top. Your caterpillars will poop (a lot!), so to make cleanup easier, line the container with a piece of paper towel or even a coffee filter. Newly-hatched caterpillars are tiny, and their poops are barely bigger than dust, but soon the larvae will grow and so will the size of their frass (the actual name for caterpillar droppings). Leaving frass in the bottom of the container provides a great medium for nasty bacteria to grow, not a good idea.

My first set-up, with floral vial and paper towel.

When you are ready to move up in commitment (or your caterpillars get too big for their first container), you could use an old fish tank, even one that's no longer watertight. You can also buy professional caterpillar cages made of mesh. I have several of these cages-- one purchased at the thrift store, and four of different sizes that I bought online. You can see one above, where I'm releasing a butterfly. The benefit of the professional cages is that they let plenty of air through. They're collapsible too, so you can easily store them in the off-season.

Some DIY instructions are available here; a good discussion of different ways to set up a cage is here. The latter link is to Raising Butterflies' web site; their store also has good and relatively affordable cages. I can't remember where I originally bought my cages, but they look like the ones on Raising Butterflies.

This very hungry caterpillar is about to devour my carrot greens!

Feeding caterpillars, part 2
When raising caterpillars, you need to provide pesticide-free food for it. Ideally you'll have grown the plants yourself, but I realize not everybody has the space or time to do so. You may get permission from your neighbors, or even be lucky enough to find a vacant lot with the right hostplant.

If you don't have enough hostplants and neither do folks you know, another way to find food is to ask people you DON'T know. Join the Facebook group Raising Butterflies and Moths for Conservation; you'll find lots of helpful information there as well as like-minded folks. A simple post asking folks who live near you for help finding caterpillar food may solve all of your problems, as the friendly members tell you where you can find safe plants or offer you some from their own yards. Don't buy plants at the grocery store, even if they're organic. Organic farmers may treat their crops with Bacillus thuringiensis (or Bt), a bacterium that's deadly to caterpillars but harmless to people.

You don't need to put an entire plant in your caterpillar cage, cuttings are fine. Keep them fresh by placing stems in a cup of water, and make sure you protect the top of the cup so caterpillars can't fall in and drown. I use floral vials I get from buying roses; these are available online or at craft shops.

I prop my floral vials in a small glass inside the cage to keep them from falling.

Pupating
Your caterpillar will go through several instars, or stages, and molt each time between instars. Some species look different in different instars, like the Black Swallowtails I raise.The final molt will be into chrysalis.

Early instars of Black Swallowtails, like this little guy, are black and white; later they get green stripes as well.

When your caterpillar is close to that last molt, it will start wandering around. This is when it's essential to have your cage securely closed. My Black Swallowtail caterpillars walk a really long way, it seems, although I've never measured it. They're looking for just the right spot to make their chrysalis. At this point you should add a few twigs to the cage leaning against the walls at roughly a 45 degree angle.  If you can find twigs that have a few branches, that will give your caterpillars plenty of choice.

This little guy nearly escaped when I took the cage lid off for photographs.

One sign that your caterpillar is almost ready will be a final poop-- this will be very liquidy, not the compact frass you're used to. The caterpillar needs to get rid of any waste before spending days or even months in the closed case of its chrysalis.

Waste voided, this caterpillar is nearly ready to pupate.

Next the caterpillar will attach itself to a twig or the wall of the cage. It will spin a small button of silk and attach its abdominal end (cremaster) to that. Monarchs will then hang down vertically, eventually curling into a "J" shape. Swallowtails will spin themselves a sort of safety belt to support their front end and hang parallel to the wall or twig.

You can see the white silk belt the caterpillar spun to hold itself to the twig.

It takes a few days before the caterpillar actually molts. If you watch it closely you may see it occasionally twitching, like someone dreaming. I'm not sure what's going on here, but perhaps it's separating inside from the old caterpillar skin. When they molt, the chrysalis shell has already formed underneath the skin.

Halfway through shedding its caterpillar skin, you can see the chrysalis already emerging.

Depending on the species and generation, you may have to wait a couple weeks to several months for the butterfly to emerge, or eclose, from the chrysalis. I'll talk about that another time, plus what to do if a chrysalis falls.

Have fun! Let me know how your caterpillars fare.

Saturday, December 17, 2016

Been a little busy...

Hi all,

Just a quick note to apologize for the lack of posts this month. I took a really interesting course this semester, called Connecting to Science. I just gave my final presentation this week, so will start to catch up on posting here shortly. To hold you over, a butterfly and a spider:

Gray Hairstreak on ageratum

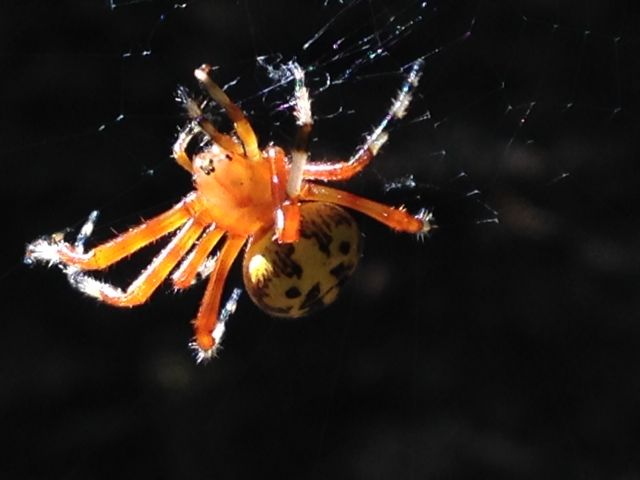
Pretty sure this is a female Spotted Orbweaver, Neoscona crucifera. Seen in NC, Oct 2015

Monday, November 14, 2016

Five Fantastic Nature Parks in Florida


To me, nature in Florida is exotic and amazing. The lush tropical swamps and marshes, the tangled mangroves, the bright aroma of citrus orchards, and of course the year-round cacophony of vivid flowers and verdant foliage.  It's a far cry from the chilly winters in Maryland where I now live, to say nothing of Massachusetts where I grew up!

So I love going birding and/or butterflying in Florida when I have the chance. I used to visit the Sunshine State frequently while growing up, since my maternal grandmother lived in Delray Beach. My husband & I got married in Disney World as well, so the two of us spent lots of time in Florida while planning the wedding, and in the years since.

Over the years we've explored many parks all over the eastern United States in search of butterflies and birds. Some were successes, some not. If, like me, you enjoy exploring nature and wildlife, Florida is a great state for it! Sometimes it's hard to narrow down park recommendations when you're just starting to explore an area and don't already have a local contact. Florida has so many awesome parks, it's hard to choose which ones to visit. So to help with that, here are five of my favorite places (so far) to look for either birds or butterflies in Florida.

1. Orlando Wetlands-- Orange County
This park isn't actually in Orlando or even very close-- it's more than an hour's drive east of Orlando, in a tiny town called Christmas. (That was a bit of a surprise to me the first time, I planned our inital visit when we were also at Disney World and I thought it would be a quick side trip. Not very quick, but definitely worth it! We've been back many times since.)

Juvenile Little Blue Heron at Orlando Wetlands

The network of canals and shallow lagoons holds waterfowl galore, plus of course many alligators. The Environmental Education center also has a small butterfly garden around it with interpretive labels. The park offers buggy rides to get you further out than you might go just walking. Make sure you check the Wildlife Sightings list outside the visitor center before you head onto the trails, too, in case any good species have been spotted that you could target. I always try to make an entry in these kinds of lists when I finish a visit, to make sure other folks know what's there and also to let park staff know how much we appreciate their conservation work.

Sneaky Sandhill Crane beneath the birdfeeder

The most recent trip we made included a close encounter with a Sandhill Crane who had found the bounty of the birdfeeder next to one of the picnic shelters. Clever bird!

2. Boyd Hill Nature Preserve-- Pinellas County
Despite being right in the midst of St Petersburg, this park has a huge diversity of habitat, from dry scrub to wetland to lake's edge. Thus it hosts lots of butterflies and birds. The Nature Center also has an aviary with several raptors such as peregrine, harrier, osprey and Bald Eagle, all of which also occur naturally at the park. I have to admit, though, my favorite part of this park is encountering the adorable Gopher Tortoises lumbering across the paths.  I don't know why they strike me as particularly cute, but they do, they're so grumpy and curmudgeonly. Just look at this individual:

This grouchy Gopher Tortoise wasn't so pleased to encounter us!

3. Fred & Idah Schultz Preserve-- Hillsborough County

This park was down a tiny gravel road, if I remember correctly. Like Boyd Hill, it consists of a mix of sandy scrub and wetlands. There were tons of flowers blooming when we last visited, and butterflies everywhere. This is where I got my first Oak Hairstreak, a real thrill. Other butterfliers in the area visit the park regularly, and sometimes post their lists to the sightings page for NABA (North American Butterfly Association). That's how I first heard of the park, by finding a trip report there that included some of my target species.

My first Oak Hairstreak butterfly. Sorry for the obscured view, I chased this little devil quite a bit before getting a decent look.

4. Loxahatchee NWR-- Palm Beach County
This is definitely a sentimental favorite, as my grandmother used to volunteer here and we frequently visited with her. It's made up of both cypress swamp and a network of sloughs, or canals, and thus has lots of waterfowl, waders, and alligators. I didn't pay attention to butterflies back when I was a kid, but in 2015 V and I went on a grim, cloudy day and still found good butterflies. Sadly, few of the photos from that day were worth anything. Check out their website for more information, though!

5. Wakodahatchee Wetlands-- Palm Beach County
This small park is  run by the Palm Beach County water management folks. It's actually designed to help process and filter wastewater from one of their water reclamation plants.  The main attraction is a 3/4 mile long boardwalk the winds through the wetlands so you can get right up close to birds and other wildlife. It's really cool being able to walk right through the marsh and watery areas. Honestly I have not visited Wakodahatchee since before I got into butterflies. I used to visit frequently with family when we were visiting my grandmother, though, and remember loving the birding opportunities there.

What are your favorite parks in Florida to find birds and butterflies? Share in the comment section, and I'll add them to my "must visit" list for next time!

Tuesday, September 6, 2016

Not the Best Day to Be A Butterfly!

I went for a walk at lunchtime recently at Brookside Gardens. This isn't abnormal for me, but I needed it more than usual that day, after two days of back-to-back meetings. I'd fought a headache most of the morning so I hoped that a dose of nature would help me feel better. However, my wildlife encounters were a little more alarming than I quite expected.


First, while I was counting Sachems and other small Skipper butterflies around some zinnias, I spotted a desparate fluttering below one pink flower. As I looked closer I saw a very tattered Monarch butterfly struggling in the clutches of a praying mantis. As if it wasn't enough to be caught and know you were going to become somebody else's lunch, it looked like the mantis was eating the Monarch still alive! I watched in combined fascination & horror for a few minutes, during which time the butterfly never stopped struggling and fighting for its life. It was still fluttering wildly when I walked away.

Amazing to watch the battle between hunger and desperate survival.

I next headed down to our butterfly garden. I anticipated looking for more Monarchs in a happier state, maybe spotting some fat larva munching on succulent milkweed. But then I spotted a faded Tiger Swallowtail struggling on the ground. I leaned down for a closer look and saw that it was battling for its life! The struggle was so vicious I couldn't make out the aggressor very clearly right then, so I took photos to get a better look later. The butterfly was clearly soon to be a goner so I picked it up to hold it for better photos and observation. If that makes me a horrible monster, so be it-- for science! :-)

This shot of the hornet biting into the butterfly is so creepy and fascinating to me.


When I looked at the photos back at my office I saw a Bald-faced Hornet was attacking the butterfly. I had no idea they were even predators let alone would attack a butterfly. I looked for more life history information and found that yes indeed, they do sometimes kill and eat other insects in addition to also eating nectar & pollen, and serving as beneficial predators. Wow.


Yes, I'm heartless sometimes. You have to be, to study nature!


It's great finding new things to see and learn no matter how many times I explore the same bit of territory. I do feel somewhat sad for the butterflies but hope their predators continue to thrive. That's what keeps the balance in the ecosystem.

I spotted the same praying mantis on my way back, now sated and cleaning butterfly gore off its forelegs.
Today's location:

Monday, March 21, 2016

Not Just Straws: My New Understanding of How Butterflies Eat

A few years ago, on one of my first blog posts about butterflies, a commenter asked me whether butterflies that ate mostly nectar had different mouthparts than did butterflies that preferred rotting fruit. At the time I didn’t know for sure, and all the information I could find did not differentiate between species. So I said I thought they all were pretty much the same. In fact it was pretty difficult to find images showing the mouthparts of different butterflies... Until now!

Last month I was delighted to find a blog post on this very subject. It turns out I was wrong, the mouthparts do vary depending on a butterfly’s preferred food source.

I already knew that a butterfly eats through its proboscis, a coiled up tube that is actually made from two mouthparts fused together. The generally accepted way that a proboscis works is like a straw, to suck up liquid.

However, sipping liquid through the straw is not the only thing going on. In fact, it turns out butterflies also have little sponge-like tissues, called legulae, at the end of the proboscis that allow them to absorb nutrients from mud or other sources that aren’t already liquid. It’s this sponge that varies between nectar eaters like Tiger Swallowtails, and non-nectar eaters like Commas.

Even a butterfly that frequents flowers, like this Tiger Swallowtail, can also absorb salts and minerals from mud by using the legulae at the tip of its proboscis.

This Eastern Comma, on the other hand, never visits flowers at all. It has different legulae to absorb minerals from rotting fruit and dung as well as mud.


In fact, some butterflies even eat blood. A friend of mine once watched butterflies flock to the open wound on a dying turtle, and told me how horrific she found it to see these graceful creatures take life from the turtle in its last moments! Yikes.

So, Hannah, I finally found the answer to your question. Butterflies do have different mouthparts depending on what they like to eat. I’m sorry I couldn’t find this in time to be relevant for you, but perhaps you’re still out there looking for the answer. In that case, please go over to Ask An Entomologist  to see some amazing microscopic photographs of different mouthparts. The original paper is also located here if you want to check that out too.

I love learning new things, even if I get proved wrong in the process!

Monday, March 14, 2016

A Garden Experiment: expanding my butterfly garden

I hope to see more butterflies like this Painted Lady in my yard this year!


This fall I decided I just didn’t have enough area in my yard devoted to butterfly beds. Some of this was inspired by the great gardens I observed on my Big Year excursions, especially the enormous field of zinnias at the Dismal Swamp welcome center in North Carolina. I didn’t have nearly as many butterflies in my yard as were at the zinnia field, nor did I have the diversity of insects that those zinnias attracted. So I decided to add a few beds devoted to flowers for my butterflies and other pollinators.

I spotted this assassin bug feasting on an unlucky honeybee at the Dismal Swamp rest stop's zinnia field. Cool!


I also decided to try an experiment in creating these new beds. Instead of laboriously digging up the existing sod (since these beds were going to replace some lawn in my front yard), I laid out a layer of flattened cardboard boxes on top of the existing grass, wetted them down, then covered them with a few inches of mulch. I had just enough mulch left over from earlier in the summer to cover both new beds, whew!  I left that there all winter to smother the lawn underneath. Mulching them kept them looking neat and tidy, important since they’re in my front yard. Next I’ll layer some dry leaves and mostly-finished compost on top. I’ll probably add some additional soil too, depending on how much compost I have available. Leaving the cardboard in place under these beds should help control weeds in my new flowerbeds, and it will eventually decompose completely.

Here are the new beds in the fall. Soon it will be time to add more layers of soil and compost, then add my plants!


I’ve started seeds for butterflyweed (asclepias tuberosa), pentas, and verbena bonariensis already. I also purchased zinnia seeds, which are direct-sow. I usually like to focus on native plants in my ornamental beds, but am willing to grow non-natives if they are particularly attractive to butterflies & other pollinators. I noticed verbena bonariensis was very popular with butterflies and hummingbird moths at Brookside Gardens, so thought I’d try it. The pentas are also quite popular with butterflies in the Wings of Fancy butterfly exhibit, so I thought I’d see if my wild butterflies like them too.

Southern Broken-dash enjoying Verbena bonariensis.


I’ve learned a lot more about butterfly gardening since I started here at this house. I’ve learned that butterflies are very nearsighted and really need big swaths of blooms to attract them, rather than one plant here & there. So I’m only planning a few kinds of flowers in those beds. Lots of bright attractive blossoms during the main part of the summer is my central goal here.

With the butterflyweed I hope also to attract egg-laying Monarch butterflies. It would be really fun to add Monarch caterpillars to my invertebrate menagerie in the summertime! Even if I don’t get caterpillars, the bright orange flowers should attract plenty of hungry bees and butterflies. I think this is my third or fourth time trying milkweed; all the previous times I direct-sowed in the fall and didn’t get any sprouts in the spring. So this time I’m raising the seedlings indoors where I can protect them better. If the first batch of seedlings fails I have more seeds and will try again. The tiny new sprouts look healthy so far, though, so I am feeling optimistic.

Baby butterflyweed with their first real leaves! Also marigold seedlings in the back.


What about you? Are you growing anything new this year, or trying a new technique? It’s fun to experiment in the garden. I’m trying a few new plants in my vegetable garden this year as well; I’ll write about that more in a future post.

Happy gardening! Spring is a mere week away.
Blogger Widget