Showing posts with label food. Show all posts

Wednesday, December 21, 2016

How to make Homemade Hot Sauce

My very own hot sauce!


After years of growing hot peppers, I finally tried making my very own hot sauce this fall. I did lots of research online, reading chili grower message boards and perusing dozens of recipes from Pinterest and my favorite food blogs. Finally I felt like I had a good enough idea to give it a shot.

The pepper I grow is called Hot Lemon and has a faint citrus-y flavor under its heat. So I decided to make a vaguely tropical hot sauce with lemon juice, ginger, and pineapple. 

Ingredients for a fiery golden hot sauce!

Ingredients:

8-10 oz fresh hot peppers, rinsed and stemmed
3 inches of fresh gingerroot, peeled and cut into coins
2 C water
juice of two lemons (I had about ½ C)
enough white vinegar to make 1 C when combined with the lemon juice
½ large sweet onion, diced
½ C canned crushed pineapple
salt to taste (I used ½ tsp)

Instructions:

Saute peppers, ginger, & onion. I might have browned mine too much; the finished sauce was darker than I hoped.

Saute the peppers, onion, and ginger in a bit of olive oil for 5 minutes on high.
Next, add the water and simmer until water is mostly evaporated, 20-30 minutes.
When the water has evaporated, set the pepper mixture aside to cool.

Simmering

Nicely evaporated.

Combine the pepper mixture and the rest of the ingredients in a blender or food processor. Puree.
Taste (cautiously!! Have some milk handy to quench the fire in your mouth and cleanse your palate between tastings). Add a bit of salt if you want, maybe more pineapple. The amount of fire will depend on the type of pepper you use. Hot Lemons are pretty darn hot, not the level of habaneros but I think hotter than jalapenos, ounce for ounce.

Yum, pepper puree!

Next, pour the slurry into a fine mesh strainer set over a bowl, to strain out the solids. It will probably take a while, even if you work on pressing the mixture with the back of a spoon or a rubber spatula like I did. My mixture was so thick we let it strain overnight to make sure we got all the liquid out.

So thick the liquid needed to strain overnight.

Finally, pour the liquid into jars. I had hoped for color a little more sunny than what resulted; in hindsight maybe I shouldn’t have let the peppers brown quite as much. That probably wouldn't matter so much if my peppers were red to start with. 

I’m storing my hot sauce in the fridge; I’m sure you could also process bottles in a hot water bath to make them shelf-stable without refrigeration. We also saved the solids in a separate container. A tiny bit of the fresh solids in stir-fry was quite nice; we may dehydrate and powder them as a spice mix too.


Why yes, I did put the hot sauce in antique glass vials.

 
So how did it turn out? Quite hot. Much hotter than either Tabasco or Franks’s hot sauces, two of the commercial hot sauces that are regulars on our table. Honestly I can’t taste the lemonyness as much as I’d hoped because it’s so fiery. Maybe next time I’ll use a smaller batch of hot peppers but keep the liquid the same. I know the ginger adds a lot of fire too, so I’ll think about reducing that next time. But it’s still really good! Not perfect but I wouldn’t hesitate to offer this to my snootiest of hot sauce-loving friends.

After using the sauce for a couple of weeks we also decided it needs a bit more something, maybe garlic or even a dry spice like ground coriander seeds. Next time! This recipe still makes a good basic hot sauce with room for improvising.

Oh, another note: when we were making the hot sauce and tasting it for salt and such, we just had it straight, dabbing the tip of a finger into the sauce and onto our tongue. I mentioned having milk available to calm your palate between tests; I wish we had made rice or something to taste the hot sauce on, rather than just having the sauce all by itself. That would probably have made it easier to judge whether other flavors were needed beneath the heat.

Saturday, November 28, 2015

Don't toss those apple scraps-- make easy apple peel jelly!


Save the scraps and peels from making an apple pie, and turn them into a beautiful (and delicious) jelly


We always make apple pie at Thanksgiving. Usually my mom and I make a couple others as well: cherry, plus blueberry or peach. Apple is a given though, and for the past few years it's been my responsibility to peel and slice the apples. Seven or eight medium size apples go into the pie, and no matter how careful I am peeling and coring them, there's inevitably quite a bit of flesh that gets removed. 

I felt so guilty about discarding all this edible fruit.  I was sure there must be a way to make something out of the peels and cores, but had a hard time finding any suggestions. This year, though, I finally found a way to pull as much usefulness out of the peels as I could, courtesy of A Year Without Groceries: I made apple peel jelly!

I am amazed how simple the process was. You don't need to add any extra pectin, since there is so much pectin in the apples themselves. I have never made jelly or jam before, so was a little nervous about the process (especially with my family members all waiting to sample the results). It came out so well, though, I am considering making a big batch of apple butter or another pie when I get home, just to have peels to make more jelly!

Ingredients:
Apple peels and cores
Water
Lemon juice
Sugar
Cinnamon (optional)

Instructions:  

1. Put the apple peels and cores into a large pot, and fill with enough water to just see the water below the top peels.

I used a mix of apples in the pie and therefore in the jelly: Jonathan and Granny Smith. This jelly is very sweet so you probably want to include at least some tart apples.  

2. Bring the water to boil and cook, uncovered, until the peels are quite soft. The water will turn a lovely shade of pink. 

We tossed the cooked peels outside for the birds and squirrels after straining the liquid. At home I would have added them to my compost pile.

 3. Now strain the liquid into another pot.  You want to use a fine-mesh strainer (not a colander) to make sure things like seeds don't end up in your jelly. Press the solids against the strainer to make sure all the juice is squeezed out. I'm pretty sure a bit of pulp made it through my strainer, but the jelly still turned out nice and clear.

You'll want a smaller pot for boiling down the liquid. It starts out looking fairly cloudy.


4. Measure how much liquid you have at this point. (I had 3 1/2 cups.) Add 1 TB lemon juice for every 2 cups liquid, and 3/4 C sugar for every cup of liquid.  I also added about 1/2 tsp cinnamon.

 Bring the liquid back to a boil. Watch closely; when it gets close to being done it starts to foam up. You don't want it to boil over!

As the liquid merrily boils away, you can see it starting to clarify already.

You have to boil the liquid for quite a while to reduce and concentrate it. I think my batch took about 40 minutes, but I forgot to check the time when I started, so I'm not sure exactly.  The temperature of the liquid has to get up to 220F and stay there for a while before it will jell. 

5. While the liquid is boiling, put some ice in a small bowl nearby and get a small spoon ready. Periodically scoop a small amount of the liquid with your spoon, then place the spoon on the ice to cool it rapidly. Once cool, tilt the spoon over the pot to see how runny it is. When you first start, it will be very runny. A little later it will start to get thick and syrupy but still pour off the spoon in an even stream. When the jelly is almost done it will be even thicker but still drip off the spoon. It's done when the chilled spoonful has solidified and doesn't form drips. 

You can see the level had reduced quite a bit by the time the liquid was ready to jell, and the color darkened and clarified.

 6. Now ladle the jelly into clean, sterilized jars. According to the original directions, you should put on sterilized lids and process in a water bath canner for ten minutes. I haven't yet overcome my anxiety about this step of canning, though, so I skipped it and am storing the jelly in the fridge.

I ended up with two small jars of jelly, plus a bit extra. Such a gorgeous color!

We tested the jelly by slathering it onto little baked scraps of leftover pie crust dough. Yum! The next morning we also had the apple peel jelly on toast and English muffins. 

Like I said, this was super easy to do. You get beautiful, delicious jelly from scraps that would otherwise be discarded. I hope you'll give it a try this winter, whether for your own household or as gifts for friends and family. Enjoy!


Thursday, October 8, 2015

Best Harvest Bread Recipe (surprise) from the bread machine

harvest bread recipe for the bread machine

For me, the fall equinox is a time of balance, of gathering in, of warm colors and rich textures. I think of deep, rich scents like baking bread, fallen leaves, and chicken roasting and sizzling in the oven. It's a warm, nurturing time to spend with friends and family, to anticipate snuggling in front of a fire with my beloved husband and cats (even if the weather isn't quite cool enough for a fire yet).

At fall equinox I can look back on a summer season that was filled with work and labor but that was also rich with rewards: delicious harvests, bags and jars of our own crops saved for the coming winter. I also like to make a point of noticing and honoring changes in the animals' seasons: to put out ample seed and suet and clean water for migrating songbirds, to make sure I'm leaving enough seedheads in my flower garden to feed the hungry finches and sparrows, and to listen for the calls and imagined whispers of both waterfowl and butterflies migrating overhead.

If the weather is good, I'll often spend the weekend nearest the equinox out in the garden, clearing leftover weeds, prepping the soil for the winter, or tending any lingering crops. This past weekend was pretty much all cold rain, so I didn't spend much time outside except for running out to fill the bird feeders. However, I still engaged in one of my favorite autumn equinox rituals: making homemade bread.

All the ingredients for this recipe lined up on the counter
Most of the tools and ingredients you'll need for this recipe. Not shown: mixing bowls, olive oil, and the actual bread machine.

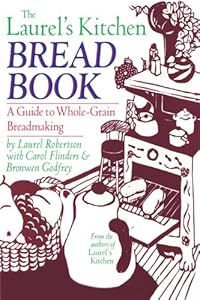
When I was younger and single, and had fewer demands on my time, I used to make all my bread by hand. I would spend hours painstakingly coaxing whole-wheat dough through multiple risings, long kneadings, and so forth to create chewy, lightly sweet loaves of whole wheat bread. I learned from a wonderful cookbook called The Laurel's Kitchen Bread Book: A Guide to Whole-Grain Breadmaking. These days, however, I don't have quite that much time to devote to a single recipe. The Laurel's kitchen technique depends on extra rising and long kneading in order to produce a tender, delicious loaf of bread from wholegrain flour.
I love the Laurel's Kitchen Bread Book for making whole-grain bread by hand
This is the edition I have; I haven't yet read the newer edition that apparently includes a chapter on using bread machines. I love the friendly, nurturing style of this book, and highly recommend it.

Instead, I now make my almost-whole-wheat bread in, surprisingly enough, a bread machine. It still takes a long time but it's mostly hands-off. After trying many recipes I found in various bread machine books and online, I finally came up with my favorite variation. This recipe has one thing that most bread machine recipes skip: proofing the yeast. This helps fill my kitchen with that warm, welcoming scent of fresh bread, and also makes a tender loaf that won't crumble into a pile of crumbs when you try to spread a slice with butter. It's almost as good as real whole-wheat bread, and probably would be even better if you removed the dough from the machine after the final rise and baked it in the oven. I've never tried that, though, usually going the completely lazy route of letting the bread bake right in the machine. You could also add any of your favorite mix-ins for a nice harvest loaf: sunflower seeds, chopped walnuts, shredded Parmesean cheese, pepitas, sesame seeds...

As a gift to you all to celebrate the onset of fall, here's my favorite recipe for harvest bread made in the bread machine. It might seem like sacrilege to not make a harvest loaf by hand, but given a choice between a machine loaf of bread and none at all? I'll choose the bread every time. Enjoy!
the delicious fresh bread sliced and ready to eat
The finished loaf, sliced to show you the gorgeous texture. I sliced it right away once I got the bread out of the pan, and we could barely restrain ourselves long enough to snap this photo before spreading butter on the hot bread and gobbling it up. 


Basic Harvest Bread from the Bread Machine

Ingredients:
1 C warm water (should feel hot to your fingers, about 110 degrees F)
3 level TB of dark honey (like clover or wildflower honey, not a delicate type)
2 1/4 tsp bread machine yeast

2 C whole wheat bread flour
1 C white flour
1 1/2 tsp salt
1/4 C extra-virgin olive oil
Mix-ins of your choice (optional): shelled sunflower seeds, pepitas, chopped nuts, shredded cheese, whatever you like.


Instructions:
1. Spray the paddle and inside of your bread machine's loaf pan with non-stick spray. (My bread machine is quite old and pretty scratched up, so I need to use spray to help the bread release after cooking. A new machine might not need this step.)
2. Add hot water to the pan. Sprinkle the yeast evenly over the surface of the water. Then pour in the honey so it stirs up the yeast and you end up with very little dry yeast grains floating on the surface.(note: I also spray the tablespoon with non-stick spray before measuring the honey.) If you need to stir the yeast into the water, do so gently with the measuring spoon; ideally though you won't need to because the action of the honey dribbling in will mix the yeast into the water for you.

when you've combined the water, honey, and yeast it should be cloudy with a few small clumps of yeast.
Once the honey has mixed in with the yeast it should look like this. But over the next ten minutes, things will change quite a bit!

3. Set the pan gently aside somewhere for ten minutes while the yeast activates and foams up.

4. Meanwhile, combine the wheat flour, white flour, and salt in a mixing bowl.
5. After ten minutes the yeast mixture should be thickly foamy, and should smell delicious like fresh bread. It might even smell faintly fermented, this is ok. Don't let it go too long, though.

after ten minutes the fermenting yeast has foamed up, looking rich and creamy.
After ten minutes the yeast has foamed up quite a bit, looking thick and substantial on top of the water-honey mixture. Happy yeast is a good thing!


6. Pour the olive oil into the pan on top of the yeast mixture. I like to try and let it dribble down the top of the paddle, again because I have an old beat-up machine that likes to grab my fresh bread. If you have a newer machine I'm sure this detail isn't necessary.
7. Scoop the flour mixture gently into the pan. I sometimes smooth out the top of the flour with my fingers, or even draw a little symbol in it if I'm baking for someone or something special (like a heart if I'm baking a celebration loaf for my husband and me).

I drew a spiral design in the bread flour once I put it into the pan.
For the equinox I drew a spiral, thinking about how things are drawing inward as the days grow shorter.

8. Set the pan into your bread machine. Use the Basic or White Bread setting if you're completely cooking the bread in the machine. Press Start.
  • Notes: Consult your bread machine instructions if you want to use the Dough setting; you'll probably need to shape the loaf after its final pulse in the machine, and then let it rise for 30 minutes in its pan before baking.
  •  If you plan to add any mix-ins, your bread machine should signal when it's time (usually just before the final knead). Mine beeps, for example. Again, check the instructions which I hope you still have (or can download online).

The fresh loaf of bread from a bread machine sitting on my cutting board
Here's the bread as it came out of the pan. You can see where the crust ripped a bit; I had to run the bread knife carefully around the pan to loosen it even though I greased my pan at the beginning. Anybody know how to prevent this?

9. About three hours later, enjoy your delicious fresh bread! I often slice a piece off while it's still hot, just to do "quality control" and make sure it's good enough to serve to anybody else. :-) This bread is really good with butter melted on a slice still hot from baking, but also with cheese, hummus, peanut butter, or even nothing at all-- it's a little sweet from the honey. Victor and I alone finished this loaf in about two and a half days. Yum!

The bread has a nice even crumb, or texture, without air pockets and dense lumps.
The crumb on this bread is nice and even, stretchy and chewy despite my not having kneaded it by hand even once. Pretty amazing. Still doesn't match bread made by hand, but it will do for now. I'm trying to learn to be satisfied with the product of the time and energy I have, not be dissatisfied because in a perfect world I could have done better.

I hope you have a lovely autumn, filled with all the goodness of the harvest. Let me know in the comments if you try any mix-ins with the basic recipe, and of course how you liked it!

Blogger Widget