Showing posts with label habitat. Show all posts

Friday, February 16, 2018

Valentines for Wildlife: Five Ways to Give Nature Some Love


A belated happy Valentine’s Day to you all! I hope you had a good time showing some love to your human sweetheart, if you have one. Perhaps you gave each other chocolates or flowers, or maybe shared a romantic candlelight dinner. But did you think to show affection to the backyard wildlife that give you so much enjoyment? Never fear, it’s not too late! Here are five easy ways you can help the wild creatures large and small that live right in your own neighborhood.


1.     If you don't already have bird feeders, you can easily make your own! Tie some string to the top of a pine cone. Then smear the cone with peanut butter and roll it in birdseed. You can add some dried fruit too if you like, such as raisins. Use the string to tie the pine cone treat to a branch and enjoy watching the birds devour this tasty treat. In my area, February is often the coldest part of the winter, and much of the natural sources of food may be used up by now. This means the birds will be especially appreciative of your generosity. Make sure to identify and report all the birds you see this weekend for the Great Backyard Bird Count! See my next post LINK for more information on the GBBC as well.

Female House Finch and male Cardinal enjoying my sunflower seed feeder

2.     Build a brush shelter for wildlife to hide in and perch on. If you haven’t gotten around to discarding your Christmas tree or wreath yet, these are excellent starts for a brush pile. If you want to go big, see LINK for my description of building a brush pile. You  can also just start with a smaller one. Lean sticks up against your discarded Christmas tree or against a fallen log to create a little lean-to, add some pine branches or fallen leaves inside and on top, and there you go. If you put this near your bird feeder you may see birds perching on or in the shelter while they eat. Chipmunks, mice, and other small mammals may shelter there as well. 

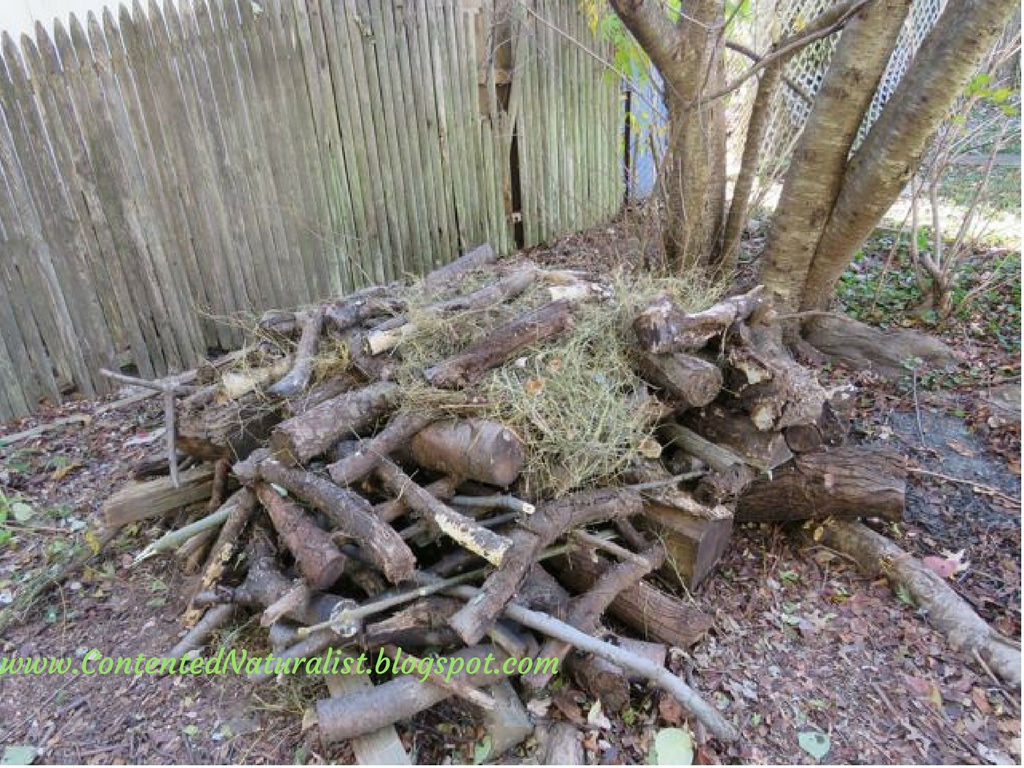
I built a pile of logs, brush, and leaves to provide winter shelter in my yard.

3.     Since birds and other animals get thirsty too, try putting out pans of water for your wildlife. If you live in a cold area, a fresh pan of hot water each morning will provide much-needed drinks and bathing opportunities. If you already own a birdbath, you may think it’s useless in the wintertime since it freezes over. Not so! You can buy a specially-made birdbath heater to keep the water from freeing completely, thus preventing you having to go out into the cold every morning to refresh it. This is a great way to attract unusual birds to your yard, or birds who don’t normally come to seed or suet feeders.

Robin splashing happily in my concrete birdbath last summer.

4.     If you have room to garden, you have many choices for creating valentines for your favorite wildlife. Now would be a great time to consider adding some native plants to your yard in order to support local bees and butterflies. If the plants also have tasty berries or seeds for birds and small mammals later, so much the better. I’ll be posting some helpful tips next week for starting a wildlife garden, so stay tuned!

A Monarch butterfly used my New York asters to fuel up for last fall's migration.
5.     Finally, even if you don’t have a yard or garden of your own, you can do other kind things for wildlife. Take the family to a nearby park or stream and spend some time picking up litter. Not only the wildlife will appreciate it, but other people who enjoy the park will too! 

I really enjoy showing some love to the wildlife all around me, and I hope you do too. Let me know in the comments what birds and other animals you see in your yard!


Friday, November 25, 2016

Create Shelter: Build a Log Pile for Wildlife


Update:
My log pile has attracted an Eastern Chipmunk! I've seen more and more chipmunks around the neighborhood recently, including one foraging in one of my butterfly garden beds. Now I have proof that my log pile is helping provide shelter for this little cutie. Hooray! 
Eastern Chipmunk approves of my log pile.

For years I’ve been tossing fallen branches and stray logs in a haphazard heap in my back yard, hoping I was making good habitat for wildlife. I’ve been watching that pile, though, and don’t see much activity going on in and around it. Birds  land on the highest branches to watch out for predators before hopping down to forage on the ground. But that was about it. I wanted to build a more deliberate (and maybe neater) brush pile for my yard animals—from invertebrates like millipedes to wrens looking for shelter from the frigid winter winds (and maybe snacking on those milipedes too), plus perhaps attracting or at least being ready for new wildlife I’ve always hoped would find my yard hospitable: toads and box turtles. I’ve never seen these in my yard, but we do have at least box turtles in our small neighborhood park. So we shall see.

To figure out how to build a better log pile, I got lots of good information from the National Wildlife Federation’s backyard habitat program and from Cornell Lab of Ornithology’s YardMap project . I also consulted these resources to get ideas before I started:

I sketched the plan in my journal as well, to organize my thinking.
One difference between my haphazard heap of branches and a carefully built log pile is the amount of shelter available in each one. My branch heap really didn’t have much shelter from winds or predators, it was pretty loosely built. A constructed log pile using sturdy logs and some insulating leaves and dried grasses should provide plenty of reliable shelter. Most sites also recommended placing your log pile where your yard meets the forest to provide shelter for critters as they go between the two environments. I don't have any forest on my property, so I put the pile beneath our cherry tree and near the fence at the back of our yard.

To start a log pile, you first lay a layer of logs in parallel lines, about 6 to 8” apart from each other. Logs at least 6” diameter seem best so the resulting tunnels are big enough for ground critters to enter and run down without having to squish. I’m sure whatever size you have would be fine, however. Anything is better than nothing. Anyway, I didn’t have many logs even close to big enough. So I took the most ungainly hunks of firewood from our ancient and decomposing pile and lined them up in parallel lines. You do the best with what you have, right?

Hopefully the crevices between my shorter logs will provide shelter for some of the smallest creatures too.


Most of my reference sites suggested making your log pile size about 10 feet by 10 feet. I didn’t have enough wood or enough space for that, though, so mine is more like 6’ x 6’, and maybe 4’ tall. We’ll probably have to put up some kind of screening soon to make sure my still-ungainly pile doesn’t bother the neighbors. In the summer I’ll add some plantings to screen it naturally, but of course that doesn’t help me right now.
Your next layer will be more logs in lines perpendicular to the first ones. Many sites also recommend partially burying some short logs vertically at the sides to use as framework, and to hasten the decomposition process. Many subterranean creatures and fungi love rotting wood, so you’d be providing habitat for them too. I didn’t do this in my pile, partially because I didn’t feel like that much effort, but also because many of the logs I was using were already well on their way to decomposing. They really don't need any hastening there!


One of my logs was so well decomposed it already had residents!

Keep on alternating criss-crossing layers of logs. You can sometimes make layers where the logs are closer together than you started with, so there are varied size holes and shelters for different size critters. As the pile gets taller you can use smaller branches as well, both to create roofing and to help insulate different areas of the pile. You can even fill in some areas with loose dead leaves or dead grasses to make additional and different types of shelter.


Our younger cat, Callie, inspects my handiwork. Isn't her camouflage amazing?
I put dried grasses in some of the upper corners of the log pile, and later added armfuls of dried leaves in other spots too.

Build your pile as tall as you like. Most of the sites I looked at recommended you aim for 6 feet. That
seemed a little exorbitant for my yard and I was quickly running out of wood anyway. So mine is maybe 4.5 feet high at most. Again, something is better than nothing!

All done!
I’ve already seen a variety of small birds landing on top of my pile, and ducking in and out of the crevices. We have several Carolina Wrens in the neighborhood who will probably love the millipedes already inhabiting the rotten logs, to say nothing of the woodpeckers. Cardinals land on top to survey the yard, like they did my old branch heap. White-Throated Sparrows have crept into some of the lower tunnels to look for seeds and bugs too. I’m eagerly anticipating some light snowfalls this winter, when I can go look for footprints leading in and out of the pile to see the amount of use it’s getting.

Speaking of snow, when you have your pile as tall as it’s going to be, you can top it off with a layer of evergreen branches for additional shelter from rain and snow. I don’t have any evergreens in my yard to harvest branches from, but I plan to ask some of the local Christmas tree vendors for some extra branches they might otherwise discard. After Christmas I’ll clip all the branches from our tree and add them (and the now bare trunk) to the pile.


I love looking out at my log pile each day when I come down to the kitchen for coffee in the morning. It makes me feel so happy knowing I increased my yard’s amount and range of habitat! It only took me an hour or two to build, too.

If you have room in your yard, keep an eye out this winter for fallen branches and downed trees to build a log pile for wildlife. Then let me know in the comments what kind of wildlife visits your yard!

Blogger Widget