Saturday, November 28, 2015

Don't toss those apple scraps-- make easy apple peel jelly!


Save the scraps and peels from making an apple pie, and turn them into a beautiful (and delicious) jelly


We always make apple pie at Thanksgiving. Usually my mom and I make a couple others as well: cherry, plus blueberry or peach. Apple is a given though, and for the past few years it's been my responsibility to peel and slice the apples. Seven or eight medium size apples go into the pie, and no matter how careful I am peeling and coring them, there's inevitably quite a bit of flesh that gets removed. 

I felt so guilty about discarding all this edible fruit.  I was sure there must be a way to make something out of the peels and cores, but had a hard time finding any suggestions. This year, though, I finally found a way to pull as much usefulness out of the peels as I could, courtesy of A Year Without Groceries: I made apple peel jelly!

I am amazed how simple the process was. You don't need to add any extra pectin, since there is so much pectin in the apples themselves. I have never made jelly or jam before, so was a little nervous about the process (especially with my family members all waiting to sample the results). It came out so well, though, I am considering making a big batch of apple butter or another pie when I get home, just to have peels to make more jelly!

Ingredients:
Apple peels and cores
Water
Lemon juice
Sugar
Cinnamon (optional)

Instructions:  

1. Put the apple peels and cores into a large pot, and fill with enough water to just see the water below the top peels.

I used a mix of apples in the pie and therefore in the jelly: Jonathan and Granny Smith. This jelly is very sweet so you probably want to include at least some tart apples.  

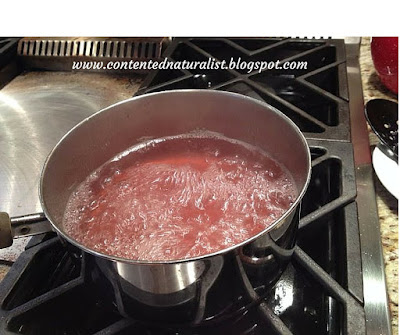
2. Bring the water to boil and cook, uncovered, until the peels are quite soft. The water will turn a lovely shade of pink. 

We tossed the cooked peels outside for the birds and squirrels after straining the liquid. At home I would have added them to my compost pile.

 3. Now strain the liquid into another pot.  You want to use a fine-mesh strainer (not a colander) to make sure things like seeds don't end up in your jelly. Press the solids against the strainer to make sure all the juice is squeezed out. I'm pretty sure a bit of pulp made it through my strainer, but the jelly still turned out nice and clear.

You'll want a smaller pot for boiling down the liquid. It starts out looking fairly cloudy.


4. Measure how much liquid you have at this point. (I had 3 1/2 cups.) Add 1 TB lemon juice for every 2 cups liquid, and 3/4 C sugar for every cup of liquid.  I also added about 1/2 tsp cinnamon.

 Bring the liquid back to a boil. Watch closely; when it gets close to being done it starts to foam up. You don't want it to boil over!

As the liquid merrily boils away, you can see it starting to clarify already.

You have to boil the liquid for quite a while to reduce and concentrate it. I think my batch took about 40 minutes, but I forgot to check the time when I started, so I'm not sure exactly.  The temperature of the liquid has to get up to 220F and stay there for a while before it will jell. 

5. While the liquid is boiling, put some ice in a small bowl nearby and get a small spoon ready. Periodically scoop a small amount of the liquid with your spoon, then place the spoon on the ice to cool it rapidly. Once cool, tilt the spoon over the pot to see how runny it is. When you first start, it will be very runny. A little later it will start to get thick and syrupy but still pour off the spoon in an even stream. When the jelly is almost done it will be even thicker but still drip off the spoon. It's done when the chilled spoonful has solidified and doesn't form drips. 

You can see the level had reduced quite a bit by the time the liquid was ready to jell, and the color darkened and clarified.

 6. Now ladle the jelly into clean, sterilized jars. According to the original directions, you should put on sterilized lids and process in a water bath canner for ten minutes. I haven't yet overcome my anxiety about this step of canning, though, so I skipped it and am storing the jelly in the fridge.

I ended up with two small jars of jelly, plus a bit extra. Such a gorgeous color!

We tested the jelly by slathering it onto little baked scraps of leftover pie crust dough. Yum! The next morning we also had the apple peel jelly on toast and English muffins. 

Like I said, this was super easy to do. You get beautiful, delicious jelly from scraps that would otherwise be discarded. I hope you'll give it a try this winter, whether for your own household or as gifts for friends and family. Enjoy!


Tuesday, November 24, 2015

My Garden's A Mess-- I Like It That Way

This "untidy" wildlife garden provides important habitat for lots of small wild creatures.

My garden's a mess! Here's why that's ok.


Lots of garden books and websites talk about tidying your garden at the end of fall: cleaning up, removing dead and spent plants and debris, and so forth. I always used to feel guilty when I read those articles because I never got around to much outdoor tidying. But I've learned since then that you want to help wildlife it's actually important to leave quite a bit of deliberate mess in your winter garden. Hooray!

My garden beds are only ever tidy looking before anything has been planted there,
like these two new beds I added this fall.  They'll never be this "tidy" again.

What To Keep... and What to Discard

Of course it matters what you keep and what you don't. I'm not advocating complete garden anarchy here. You definitely want to clean up and discard any diseased plants, and you probably want to remove the more persistent weeds that are likely to survive through the winter. Otherwise you'll still have the same disease around in the spring, and those weeds will only be stronger for having slowly grown enormous root systems during the winter. Little devils!

You should, however, keep plenty of seedheads from your flowers so that winter birds can munch on them. My goldfinches love echinacea, for example. Also important are hollow plant stems. Many insects survive the winter by sheltering inside them, and birds like Carolina Wrens and Downy Woodpeckers love snacking on those little nuggets when they find them!

Plenty of seeds in this goldenrod for the finches, and I'm sure lots of tiny insects and spiders for wrens as well!


Leaf debris is important for your garden's health as well as the wildlife's. Not only will the leaves slowly decay over the winter, returning important nutrients to your soil, but many small creatures will shelter in them. Many moth species form their cocoons in the leaf litter, so if you're too assiduous in removing fallen leaves you might actually be removing your gorgeous moths as well!

Over the years plenty of fallen leaves have built up in this bed. I add to them by raking in leaves from my driveway or the road gutters. The natural mulch definitely helps my plants; I hope there are unseen creatures benefiting too.

Additions To the Messy Fall Garden: Structures and Shelters

I often also leave up some of the trellis structures I built, since many birds like to perch on them during the winter. My feeders get pretty crowded at times, and it's fun to see whole squadrons of finches and doves lined up on the fences and tomato frames waiting their turn. If you're participating in FeederWatch this season, like I wrote about here, you get to count all the birds attracted to your yard, whether they're actually on the feeder or just waiting. Bonus! If you didn't have any trellises in your summer garden, you could easily add some structures for the fall & winter.

This fence at the edge of my property is often full of sparrows waiting their turn at the feeder, or surveying the area before deciding it's safe enough to forage on the ground. You could provide similar benefits with something as simple as a twiggy branch or two stuck in the ground.


Some butterflies that overwinter as adults, like Commas and Question Marks, will shelter under loose bark to survive the cold. If your trellis was built from natural logs or branches, you might host a few butterflies too! Some wildlife gardeners also like to keep a loose brush pile to provide shelter in the wintertime. One of the most important things about building a brush pile for shelter is to make sure there are plenty of holes and access points for small creatures to enter. Chipmunks, shrews, insects, songbirds, and more might use your brush pile to escape cold, rain, and snow, as well as hide from their predators. In my wildlife garden beds I just leave lots of fallen leaves and debris for small creatures to use as shelter.

The tangles of sprawling wood aster provide plenty of cover for small sparrows, and also keep blooming quite late in the season, providing food for many honey bees and other insects.


So whether you're a lazy gardener, a newbie gardener running out of time, or even an experienced gardener just starting to get into this whole gardening for wildlife thing, relax! The stuff you don't have time to clean up from your garden this fall is probably better off left in place. You can even build new structures to add to your garden's habitat, like creating special log piles to give wrens a cozy place to hide from predators, or adding stumps with loose bark to shelter butterflies and other bugs.

I hope you enjoy sharing your garden with wildlife this fall and winter. What else do you do in the cold weather to make a welcoming home for birds, bugs, and other beasties? Leave me a note in the comments so I can try it too!

Wednesday, November 4, 2015

Be a better gardener next year: how keeping a garden journal will improve your garden skills and results

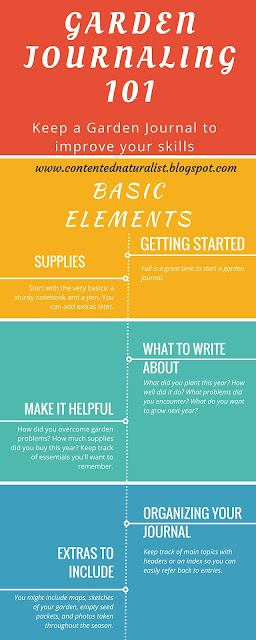
infographic about keeping a garden journal


I like to keep a garden journal. I note what I've planted, how it's doing, how long it took until seeds germinated and later bore fruit, and all kinds of other information. I also write about what I've been doing in the garden or what I've been thinking about the garden. It's a fun pasttime, but even more it's a great resource for me each year since I can look back on what worked and what didn't the previous year.


photo of a notebook, a pen, and a cup of coffee
To get started, all you really need are a notebook, a pen, and of course your beverage of choice.


When should you start a garden journal?

If you've been thinking about starting your own garden journal,  fall is actually a great time to start. Of course you could begin a new garden journal any time of the year, but the reflection and contemplation I feel in fall is great for getting a journal (and a garden) going. You'll muse about what worked in the garden this year, or what you hope to have in a future garden, and lots of things in between.

You can also talk to other gardening friends (and bloggers like me!)  to find out what worked and didn't work for them. Was bacterial wilt a common problem in your area this summer? Did almost everybody's tomatoes take forever to start producing due to a long cold spring? These are good things to know for future planning, but also for what I like to call "CSI: garden edition." Why did my cucumber vines disintegrate in a matter of days when they should have kept producing for several more weeks? Was it something I did? Could I have prevented it?
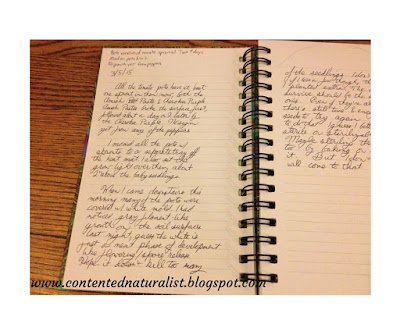

A handwritten journal entry about my garden.
I track anything that might become a problem, so I'll know when it started.

What to include in your garden journal

But I digress. My garden journal is somewhat random. I buy a pretty blank notebook at the bookstore, and write in it whenever the mood strikes me. You can be more or less haphazard than I am, but there are a few crucial pieces of information you must include in your journal to make it a resource that will help improve your garden:
  • What you planted and when.
  • How well the seeds germinated, and how long it took.
  • Where you purchased the seeds/seedlings, and how much they cost.
  • Any special care they needed (that you did or didn't give them), e.g. you had to constantly water them during a dry spell. This will help you decide if a specific plant might be worth growing again.
  • How much supplies you bought this year. Tracking how many bags/ cubic feet/etc. of mulch, compost, etc. I bought last year is really helpful for me each spring when I have to figure out what's needed, and also helps with my budgeting.
  • Any difficulties you encountered over the season, and of course anything you tried to overcome them, successfully or not.
  • How well each crop did-- how long until you got the first harvest, and how well you feel the plants performed over the entire summer. Did you get enough beans? Were the tomatoes really late compared to what you expected? Did one variety of peppers resist whatever wiped out the other variety?


Handwritten journal entry including a sketched map
I  include sketches of my garden layout each year, to help with planning crop rotation.

How often to write in your garden journal

Honestly, you don't have to have a specific schedule for writing in a garden journal, just whenever you have something to contribute. In the spring I tend to write frequently, then not so much in the hot summer (saving most of my energy for weeding and/or harvesting!), for example.  I also like to use my garden journal in the wintertime for planning and dreaming. I brainstorm what veggies I want to grow, start thinking about what new ones I might try this year (since I like to always have an experimental crop or two), and so forth.
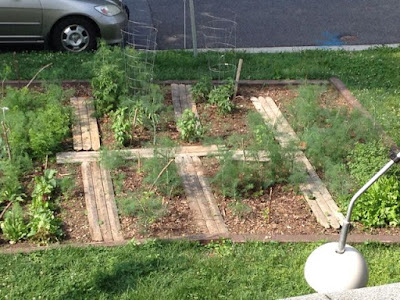


photograph of my garden with lots of dill plants growing.
This was the year I let the dill take over my garden. Whoops!

Extras to include in your garden journal

Other things you might like to put in your garden journal include photographs, sketches of the layout or even of individual vegetables, empty seed packets, and so forth. You could have a garden journal that's really half scrapbook, half journal, if that's what you enjoy. I don't do much scrapbooking but I do include lots of hand-drawn sketches each year of my garden layout. I like to make sure I'm rotating crops properly so I need to remember where the tomatoes have been from year to year. For that matter, I often need help remembering what kind of sprout I'm looking for in each row in the spring! I know some folks put markers in their garden, but I don't bother. Instead I just consult my map.

Hand drawn sketch of my garden layout this year, on green paper
This year's garden map. It went through several changes between planning and planting.


You might also like to track weather in your garden journal, especially if you can take the soil temperature. This might help later when you see that none of a certain seed germinated and you're trying to determine why-- maybe the soil was too cold or hot, or you'd had too much rain lately. You can also watch for any changes to weather averages over many years, and start to consider those when you're planning the next season. Are first frosts averaging sooner? Have several years in a row been much dryer than usual? I don't usually write frequently enough to make regular weather observations in my garden journal, but it does seem like a good idea to try.

Some gardeners like to track phenology in their garden journal, especially if they garden for wildlife instead of or in addition to growing crops for their own consumption. When did the monarch butterflies return? How late did they stick around in the fall? Did your redbud trees bloom earlier or later this year than last year? Phenology is a fun science of when events happen in nature. Don't overwhelm yourself, though-- if you're already super busy, you might find that sticking to just a few main questions is easier and more useful in your journal.

In the late winter and early spring I also use my journal to do price comparisons between different seed catalogs, so I can stick to my budget. Sometimes the same variety is in multiple catalogs but for different prices and/or different packet sizes. Other times I can compare different varieties: I can make lists of each one's touted benefits, both from the catalog description and any gardener reviews I can find online. This fall, on the other hand, I was able to jump on a last-minute seed sale that offered both free shipping and reduced-price seeds, because I knew I was unlikely to find better prices elsewhere. Yippee! I'm pretty sure the grower was offering those seeds at a discount only because they're remnants of 2015 seeds, but I also know from doing my own germination tests of four-year-old seeds that these should be fine for growing next year.
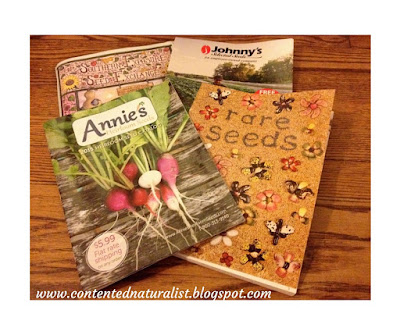

Photograph of seed catalogs from Annie's Heirloom Seeds, Johnny's Selected Seeds, Southern Exposure Seed Exchange, & Baker Creek Heirloom Seed Company
Some of my favorite seed catalogs.

Other ways to make your journal a helpful tool

I don't know about you, but I have a really hard time remembering from one summer to the next how well something did, or exactly when I started my tomato seeds inside. Keeping a garden journal means I don't have to do the same calculations every winter, and also means I don't miss the start date because I waited too long to even think about it. For that matter, if for several years I ended up not being able to plant outside for a few weeks longer than I'd intended, but the crops grew just fine, that's great knowledge to have! So would be knowing that even a couple weeks' tardiness means the lettuce won't grow big enough before it gets too hot outside.

Organizing your garden journal

Since I use a blank book for my garden journal, I always leave room at the top of each entry to go back and write quick bullet lists of essential information. That way I can skim through previous entries to find certain information without having to read every single one. It's also essential to date each entry, by the way. I tried making my own index at the back of a journal one year, so I could quickly look up when I wrote about the peas sprouting, for example. The problem with the back index was that I quickly ran out of space. Maybe next time I start a new volume I'll make an index for just keywords and page numbers (or dates), so all the times I wrote about the peas can be grouped together, as will all the times I wrote about any seed sprouting. That might work better.

If you enjoy using "to-do" lists, your garden journal would be a great place to copy your lists of garden tasks each day/week/month/season. This could be a helpful reminder from year to year what's been done and what still needs to be done. If you're anything like me and often don't get to the bottom of a to-do list, it can also help you remember the following day/week/whatever that you should add that back to your list.  Most of my daily to-do lists are made on the back of scrap paper or junk mail envelopes, which makes it easy to carry around with me during the day but also makes it easy to misplace.
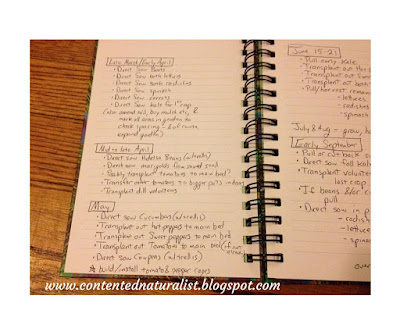
Handwritten journal entry with to-do lists for March, April, May and June.
This year I made a set of to-do lists so I wouldn't forget anything. It really helped, even when I missed my goal date by a few weeks.

Essentials to remember for garden journaling

  • Writing in your garden journal should be enjoyable. Remember to write about triumphs as well as failures!
  • Your garden journal will be potentially useful as a whole, but each individual entry doesn't need to seem useful at first. Just write about what's been happening in the garden when you feel like it.
  • Reread your previous entries each year (or more often) to see how you might grow as a gardener. Maybe after the pain has subsided from all your tomatoes dying prematurely, you'll be able to see what you could have done better.
  • Let your garden journal grow with you-- you can add or omit sections from year to year as needed. Keep reading about garden techniques and try new things. Talk to other gardeners too, whether online or in your own neighborhood. Soon I'll post some ideas for helpful resources for both planning and evaluating your garden, so stay tuned for that.
Do you keep a garden journal? What are the most useful aspects of a journal for your garden? Let me know in the comments if I missed anything you find essential.
Blogger Widget