Wednesday, October 28, 2015

Easy Cuban(ish) Black Beans in the Crockpot-- great for after hiking!

Delicious black bean stew with andouille sausage, perfect for a chilly evening

This weekend we had our first real fall weather. You know the kind I mean-- a nice chill in the air, crunchy leaves under your feet, sparkling clear sunshine slicing through air that is blessedly free of summer's steamy haze. A perfect day to go hiking, in fact!

And one of the best parts of going hiking is when you come home ravenous after a day of exploring the woods, climbing mountains, or strolling the shores of your favorite lake with friends or family. You open the door and are greeted by incredible smells of the stew that's been bubbling away in your crockpot while you were gone. Yum! I love my crockpot all year round, but it's just so incredibly satisfying this time of year.

Today I'm sharing with you one of my favorite recipes for an autumn post-hike meal: a Cuban-ish Black Bean Stew, heavily adapted from Better Homes & Gardens' Biggest Book of Slow Cooker Recipes. It's very flexible, you can add a different kind of sausage, extra sweet peppers, a different amount of spice, and so forth. I love topping it with chopped fresh tomatoes or a really good fresh salsa, and some grated cheese, as well as an extra squeeze of lime at the table.

I love it when I have the time to brown the sausage and onions before adding them to the crockpot. But sometimes I just run out of time. That's what happened yesterday-- I barely scraped the ingredients together before dashing out the door to drive to work. So while it simmered all day, my brilliant husband minced up a few herbs and veggies from our flagging fall garden-- one carrot, a few radishes, and several sprigs of dill and basil. These added lovely new layers of flavor to the stew, and I'm eagerly anticipating leftovers tonight. Feel free to go wild with improvisations on this one, and let me know in the comments what you try!

The uncooked ingredients before I added chicken broth. I wish you could smell the pungent lime zest, garlic, cumin, and hot pepper! The lime really gives a nice tropical boost to this stew.


Cuban(ish) Black Bean Stew With Andouille for the crockpot


Ingredients:

1 pkg Andouille sausage (or another kind of smoked sausage), sliced in half-moons
1.5 cups to 1 lb dry black beans (the original recipe calls for only 1.5 cups, but I sometimes dump in the whole pound package. Depends on how much I want to make.)
3.5 cups home-made chicken or turkey broth (or use storebought low-sodium chicken broth, two 14.5-oz cans is about the right amount)
1 medium to large onion, chopped
1 sweet red pepper, chopped
1 to 3 small fresh hot peppers, minced (I grow a small but pungent hot yellow heirloom pepper, and usually use three including their seeds. If you want less fire, use fewer peppers and/or remove the seeds and white pith from the hot peppers.)
4 cloves garlic, minced (if you use bottled garlic from the store, this is about 2 tsp worth.)
zest of one lime, shredded (I do this on a microplane zester that lets me get almost all of the zest without a single skinned knuckle. If you want, save the lime to squeeze on each serving, later)
2 tsp ground cumin
0.75 tsp salt
0.25 tsp freshly ground black pepper
2 bay leaves
Optional: fresh or frozen cooking greens (kale, collards, spinach, turnip, etc.)

Instructions:

1. Rinse your dry beans thoroughly until the water runs clear. While doing so, pick out and discard any misshaped beans or pebbles that might have snuck in.
2. Put the beans in a large bowl with enough cold water to cover the beans by at least an inch or two. Let sit overnight, covered with a towel to keep out dust.
3. In the morning, drain the beans and rinse once more.
4. Put the beans in a slow cooker, at least 3.5-4 quart size or bigger.
5. Brown the sausage in a large frying pan over medium-high heat. Once the sausage is browned on all sides, scrape it into the slow cooker on top of the beans.
6. Return the pan to the heat and add the onion and sweet pepper. Saute until the onion is golden. This step is important so the vegetables pick up the flavorful fond (browned bits) from the bottom of the pan. Use a wooden spatula to scrape up the fond if you need. You can also add a dash of the broth to the pan if you need help loosening some of the fond.
7. Pour the cooked vegetables into the crockpot with your beans and sausage.
8. Add the minced hot peppers, garlic, cumin, lime zest, bay leaves, and salt & pepper. Pour the broth over all.
9. Cover and cook on the low setting for 10 to 12 hours.
10. If you happen to have any fresh or frozen cooking greens like kale or collards, toss them in for the last half hour or so of cooking for a great nutritious boost.  At the moment I have a ton of frozen kale in my freezer from the summer, so that's what I usually do. If your family doesn't like cooked greens, just skip this step. The day I made the batch shown in these photos, I had meant to add greens but it smelled so good when I came home I just couldn't wait that long to eat. :-)

As any bean stew should be, this is also good over rice, or you can just eat it with toppings like you would chili-- chopped fresh tomatoes, salsa fresca, grated cheese, even corn chips. I bet it would be good with fresh bread too, to sop up any extra broth!

I hope you enjoy my take on black bean stew, and have a great time hiking this fall.

Notes:
If you use the smaller amount of dried beans, you'll have a more soupy consistency to the stew; if you use the whole package it will be much thicker. I like it both ways, myself.

As happened to me, if you're really in a rush in the morning, (or just want to minimize dishes to wash), you can skip the browning steps and just dump everything into the crockpot together. It's so wonderful with that deep browned level of flavor, though, you should try doing it at least once. If you can plan ahead, you might even brown the sausage and onions the night before!
Saturday, October 24, 2015

A Cup of Coffee and Citizen Science: how to make a difference during breakfast


If you're looking for ways to bring more nature into your everyday life, getting involved with a citizen science project is a great way to do that. Citizen science is where ordinary folks help on a genuine scientific investigation, usually by contributing their observations and/or labors to a growing bank of information. Naturalists and other scientists can use this huge amount of data to see broad trends and changes occur that they might not have seen otherwise, since it's pretty expensive to travel all over the country observing birds or butterflies or whatever the subject may be.

Thus anybody can actually contribute in a small way to scientific discoveries, which I think is pretty cool. Plus observing nature is fun just on its own! Having a framework like a specific project and goal helps keep me motivated and focused, so I thought it might do the same for others. One of my favorite citizen science projects is Feederwatch.


Basics of participating in Feederwatch

Feederwatch is run by the Cornell Lab of Ornithology and works like this: backyard birders observe their bird feeders from November through March and report how the birds they see each week. You don't have to watch and count every day, either, just two consecutive days each week. Pretty simple! You do have to pay a fee to join the project, $18 if you're not already a member of the Cornell Lab of Ornithology. If that's out of your reach, don't despair! I have a few cost-saving ideas for you in my Tips and Tricks section at the end of this post.

I wish I saw this Rose-breasted Grosbeak during count season! Sorry for the picture quality, it was taken through our very old windows.

How I like to count birds

I like to do my counting in the early mornings while I'm sipping my coffee. It's very peaceful watching the chaos of hungry birds swirl through my yard. I print out tally sheets at the beginning of each Feederwatch season so I just make hash marks as I see birds, rather than having to write out the names by longhand. Most years I've printed new pages each week so I end up with a thick binder of observation charts at the end of the season.

Another way you could do this would be to print a single chart, get a plastic page protector, and then do the hash marks in dry-erase marker each week so you can then erase them and start fresh after you've reported your data. You could even do it all electronically, on a tablet or something. I admit I'm more old-school and still like tally sheets.

If you're lucky, maybe you'll see an unusual leucistic bird like this white one I nicknamed the Ghost Finch!

Collecting Data


Here's the tally sheet I created for my watch days. It includes my most common feeder birds with extra room to write in new species at the bottom, and lots of room for hash marks beside each species. Of course you can make your own tally sheet that fits your local birds. If you live on the east coast of the U.S., though, this list should be enough to get you started.

I find it's really important to report your data promptly, rather than wait until the end of the season to report it. Two years in a row I did Feederwatch but never got around to reporting my data. Whoops! It was still fun. So maybe the clipboard and page protector would be a better motivator for reporting in that case, since you'd have to report the data before you erase it for the next week. A page protector would save a lot of paper, too.

Of course if you attract small birds you might get their predators too. Here's a young Cooper's Hawk staring intently at my suet feeder, as if to say, "If I wait here long enough maybe my dinner will show up!"

For Feederwatch, you'll also need to report basic weather conditions as well as bird totals: max and min temp, any precipitation, percentage of the ground covered by snow, and so forth. Weather Underground provides a historical record that's searchable by date, including temps, wind, and precipitation in case you forgot to note it when you were watching the birds.

Equipment you'll need to participate in Feederwatch

Inside:
  • bird book(s) 
  • binoculars 
  • tally sheet (and page protector if you choose)
  •  pen and clipboard
  • A comfy vantage spot near a window so you can see as much of the yard as possible.
 Outside:
  • bird feeders 
  • bird seed 
  • suet cakes (if you have a suet feeder)
  • optional other bird-attracting structures and/or plantings, such as
    • an evergreen shrub for cover 
    • a bird bath to provide water 
    • a fruit-bearing tree for fruit-eating birds
I usually attach extra branches from our Christmas tree above the feeders to keep some of the snow off them. Waste not, want not!

Tips and Tricks for Feederwatch

  • As I mentioned, the annual fee to participate in Feederwatch is $18. For that you get a poster of common feeder birds, a kit to help you tally birds, and of course access to all of the data entered plus the annual summary report.  If you can't afford the fee, however, you might ask your favorite nature center if they would like to participate. Then you (and maybe some of the staff) could count there. I have even seen some nature centers make a fun weekly program out of this. It's great for beginning birders and for families just getting into birdwatching.
  • If you've never fed birds before, the Feederwatch web site has lots of helpful suggestions for what and where to feed them, as well as what else you might provide for the birds (water, shelter, etc.). Check to see if a nearby store specializes in birdfeeders as well, such as Wild Bird Centers (a large chain in the US and Canada), or a local independent store like my favorite One Good Tern in Alexandria, VA. They'll not only have the supplies you need, but probably can offer helpful advice for getting started. 
  • Other ways to control your costs:
    • Does your neighbor feed the birds already? If so, maybe he or she would be willing to partner with you, or at least let you watch the birds in his or her yard.
    • Even if your local nature center doesn't participate in the Feederwatch project, if they already put out seed for the birds you could still head over there each week to observe. They might even appreciate your data at the end of the year so they know more about what kind of birds use the feeders! 
      • Do please make sure to support the nature center in any way you can if you do this: participating in volunteer clean-up days there, spreading the word about them to all of your friends and neighbors, and so forth. Maybe they even need a volunteer to fill the feeders each morning! It would be nice to offer.
  • Different kinds of seed may attract different kinds of birds. A large variety of birds enjoy black-oil sunflower seeds, though, so that's a good kind to start with. Suet feeders are very popular too.
  • If it gets below freezing in your area, a heated bird bath would be very popular for thirsty birds. 
  • Be patient if you've never had feeders in your yard before, it may take the birds a few weeks to find the lovely buffet you're providing.
  • If you can, offer more than just food in your yard. Fresh water is very important, especially in the winter when a lot of natural sources might freeze. Also birds will appreciate shelter and a variety of places to perch near the feeder while they wait their turn. 
    • You could even reuse your Christmas tree or other leafy decorations when you're done with them-- prop the tree securely against your mailbox, for example; or wire evergreen branches like pine and holly above the feeder like I did in the photo above, so they shelter the feeder from snow and rain.

The Cornell Lab of Ornithology also runs All About Birds, which provides lots of great info about birds you might see, including how to decide between certain tricky birds like purple and house finches, or Cooper's and Sharp-shinned Hawks.  Even if you don't participate in Feederwatch I highly recommend checking out their website.

The best bird I've had during count season so far was this Pine Warbler. It stuck around for several days this January enjoying my suet feeder. I hope it comes back this year!


Enjoy watching and counting your backyard birds! I'd love to hear your comments about the experience. What's the best bird you've seen in your yard so far?

Beware, though, birdwatching can be addictive! :-) So can helping with citizen science projects. I love feeling like I'm contributing something meaningful to the world, don't you?


Linking up with Saturday's Critters

Thursday, October 8, 2015

Best Harvest Bread Recipe (surprise) from the bread machine

harvest bread recipe for the bread machine

For me, the fall equinox is a time of balance, of gathering in, of warm colors and rich textures. I think of deep, rich scents like baking bread, fallen leaves, and chicken roasting and sizzling in the oven. It's a warm, nurturing time to spend with friends and family, to anticipate snuggling in front of a fire with my beloved husband and cats (even if the weather isn't quite cool enough for a fire yet).

At fall equinox I can look back on a summer season that was filled with work and labor but that was also rich with rewards: delicious harvests, bags and jars of our own crops saved for the coming winter. I also like to make a point of noticing and honoring changes in the animals' seasons: to put out ample seed and suet and clean water for migrating songbirds, to make sure I'm leaving enough seedheads in my flower garden to feed the hungry finches and sparrows, and to listen for the calls and imagined whispers of both waterfowl and butterflies migrating overhead.

If the weather is good, I'll often spend the weekend nearest the equinox out in the garden, clearing leftover weeds, prepping the soil for the winter, or tending any lingering crops. This past weekend was pretty much all cold rain, so I didn't spend much time outside except for running out to fill the bird feeders. However, I still engaged in one of my favorite autumn equinox rituals: making homemade bread.

All the ingredients for this recipe lined up on the counter
Most of the tools and ingredients you'll need for this recipe. Not shown: mixing bowls, olive oil, and the actual bread machine.

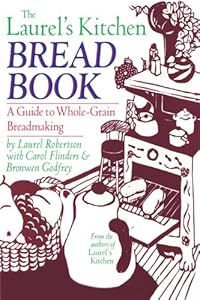
When I was younger and single, and had fewer demands on my time, I used to make all my bread by hand. I would spend hours painstakingly coaxing whole-wheat dough through multiple risings, long kneadings, and so forth to create chewy, lightly sweet loaves of whole wheat bread. I learned from a wonderful cookbook called The Laurel's Kitchen Bread Book: A Guide to Whole-Grain Breadmaking. These days, however, I don't have quite that much time to devote to a single recipe. The Laurel's kitchen technique depends on extra rising and long kneading in order to produce a tender, delicious loaf of bread from wholegrain flour.
I love the Laurel's Kitchen Bread Book for making whole-grain bread by hand
This is the edition I have; I haven't yet read the newer edition that apparently includes a chapter on using bread machines. I love the friendly, nurturing style of this book, and highly recommend it.

Instead, I now make my almost-whole-wheat bread in, surprisingly enough, a bread machine. It still takes a long time but it's mostly hands-off. After trying many recipes I found in various bread machine books and online, I finally came up with my favorite variation. This recipe has one thing that most bread machine recipes skip: proofing the yeast. This helps fill my kitchen with that warm, welcoming scent of fresh bread, and also makes a tender loaf that won't crumble into a pile of crumbs when you try to spread a slice with butter. It's almost as good as real whole-wheat bread, and probably would be even better if you removed the dough from the machine after the final rise and baked it in the oven. I've never tried that, though, usually going the completely lazy route of letting the bread bake right in the machine. You could also add any of your favorite mix-ins for a nice harvest loaf: sunflower seeds, chopped walnuts, shredded Parmesean cheese, pepitas, sesame seeds...

As a gift to you all to celebrate the onset of fall, here's my favorite recipe for harvest bread made in the bread machine. It might seem like sacrilege to not make a harvest loaf by hand, but given a choice between a machine loaf of bread and none at all? I'll choose the bread every time. Enjoy!
the delicious fresh bread sliced and ready to eat
The finished loaf, sliced to show you the gorgeous texture. I sliced it right away once I got the bread out of the pan, and we could barely restrain ourselves long enough to snap this photo before spreading butter on the hot bread and gobbling it up. 


Basic Harvest Bread from the Bread Machine

Ingredients:
1 C warm water (should feel hot to your fingers, about 110 degrees F)
3 level TB of dark honey (like clover or wildflower honey, not a delicate type)
2 1/4 tsp bread machine yeast

2 C whole wheat bread flour
1 C white flour
1 1/2 tsp salt
1/4 C extra-virgin olive oil
Mix-ins of your choice (optional): shelled sunflower seeds, pepitas, chopped nuts, shredded cheese, whatever you like.


Instructions:
1. Spray the paddle and inside of your bread machine's loaf pan with non-stick spray. (My bread machine is quite old and pretty scratched up, so I need to use spray to help the bread release after cooking. A new machine might not need this step.)
2. Add hot water to the pan. Sprinkle the yeast evenly over the surface of the water. Then pour in the honey so it stirs up the yeast and you end up with very little dry yeast grains floating on the surface.(note: I also spray the tablespoon with non-stick spray before measuring the honey.) If you need to stir the yeast into the water, do so gently with the measuring spoon; ideally though you won't need to because the action of the honey dribbling in will mix the yeast into the water for you.

when you've combined the water, honey, and yeast it should be cloudy with a few small clumps of yeast.
Once the honey has mixed in with the yeast it should look like this. But over the next ten minutes, things will change quite a bit!

3. Set the pan gently aside somewhere for ten minutes while the yeast activates and foams up.

4. Meanwhile, combine the wheat flour, white flour, and salt in a mixing bowl.
5. After ten minutes the yeast mixture should be thickly foamy, and should smell delicious like fresh bread. It might even smell faintly fermented, this is ok. Don't let it go too long, though.

after ten minutes the fermenting yeast has foamed up, looking rich and creamy.
After ten minutes the yeast has foamed up quite a bit, looking thick and substantial on top of the water-honey mixture. Happy yeast is a good thing!


6. Pour the olive oil into the pan on top of the yeast mixture. I like to try and let it dribble down the top of the paddle, again because I have an old beat-up machine that likes to grab my fresh bread. If you have a newer machine I'm sure this detail isn't necessary.
7. Scoop the flour mixture gently into the pan. I sometimes smooth out the top of the flour with my fingers, or even draw a little symbol in it if I'm baking for someone or something special (like a heart if I'm baking a celebration loaf for my husband and me).

I drew a spiral design in the bread flour once I put it into the pan.
For the equinox I drew a spiral, thinking about how things are drawing inward as the days grow shorter.

8. Set the pan into your bread machine. Use the Basic or White Bread setting if you're completely cooking the bread in the machine. Press Start.
  • Notes: Consult your bread machine instructions if you want to use the Dough setting; you'll probably need to shape the loaf after its final pulse in the machine, and then let it rise for 30 minutes in its pan before baking.
  •  If you plan to add any mix-ins, your bread machine should signal when it's time (usually just before the final knead). Mine beeps, for example. Again, check the instructions which I hope you still have (or can download online).

The fresh loaf of bread from a bread machine sitting on my cutting board
Here's the bread as it came out of the pan. You can see where the crust ripped a bit; I had to run the bread knife carefully around the pan to loosen it even though I greased my pan at the beginning. Anybody know how to prevent this?

9. About three hours later, enjoy your delicious fresh bread! I often slice a piece off while it's still hot, just to do "quality control" and make sure it's good enough to serve to anybody else. :-) This bread is really good with butter melted on a slice still hot from baking, but also with cheese, hummus, peanut butter, or even nothing at all-- it's a little sweet from the honey. Victor and I alone finished this loaf in about two and a half days. Yum!

The bread has a nice even crumb, or texture, without air pockets and dense lumps.
The crumb on this bread is nice and even, stretchy and chewy despite my not having kneaded it by hand even once. Pretty amazing. Still doesn't match bread made by hand, but it will do for now. I'm trying to learn to be satisfied with the product of the time and energy I have, not be dissatisfied because in a perfect world I could have done better.

I hope you have a lovely autumn, filled with all the goodness of the harvest. Let me know in the comments if you try any mix-ins with the basic recipe, and of course how you liked it!

Saturday, October 3, 2015

Rainy Day Reading

IIt’s been raining all morning today as well as the last two days. In addition it's been cool outside, good soggy fall weather. It really makes me want to cuddle up with hot mulled cider and a small kitten to catch up on blog reading. :-) If you’re feeling the same way, here are a few of my favorite blogs you should go visit.

For gorgeous nature photos, check out Nick's Nature Pics-- A Field Naturalist's Photo Journal.

 For thorough and fascinating wildflower profiles as well as tales of raising rabbits and homesteading, check out Bluetooth Hollow.

For amazing close-up photos and natural histories of bugs in the U.K., check out BugBlog.

While you're reading and admiring these fabulous blogs, why not indulge in your favorite comfort food? Here are a few of my favorite easy meals or snacks for a chilly rainy day, that actually aren't all that bad for you (bonus!)--

1.       I like to microwave a mug of cider with a cinnamon stick in it, for instant mulled cider.
2.       Air-popped popcorn is really good drizzled with olive oil and dusted with plenty of Cajun spice and a bit of salt. 
3.       Cheesy grits with a dash of hot sauce and more Cajun spice.
4.       Stew that's been simmering all day in my slow cooker.
5.       Fresh warm homemade bread with butter. Here's my favorite bread recipe, for the bread machine no less! Can't be much easier than that.


Stay warm, all.

Blogger Widget